Product photos are how shoppers interact with your brand on Amazon. Viewing photos is how they touch and feel your product, how they view it from different angles, and how they see it in use.
Photos convey your brand’s quality and values. They capture a shopper’s attention, create interest, and drive purchases – turning that shopper into your brand’s newest customer.
This article will show you how to promote your brand’s products through optimized Amazon product photography. You’ll learn the secrets behind creating compelling listing photos to boost your conversions and show off your brand.
Why is product photography so important on Amazon?
Photos are the majority of the experience of a product when you’re shopping online. High quality photos make a huge difference in consumer perception of the product and your brand, and in converting the sale.
When a shopper goes into a store, they can pick up a product, spin it around and poke it. When the product is online, they can’t do any of that. Your brand is represented by its photos, and this is how a shopper experiences what you want them to feel.
Photography is what sells the product on Amazon. Just look at the numbers:
- The average shopper reads only 20% of the words on a web page, but will view every single product image.
- 63% of consumers say product images are more important to them than descriptions.
- 53% of consumers say product images are more important to them than ratings or reviews.
When someone is scrolling through search results on Amazon, they’re going to click the picture that really grabs them. The main image is therefore particularly important, because it’s the beginning of the buyer’s experience of your product.
In summary, getting your product images right will give you a big advantage over the competition.
How many product photos should I have in my listing?
The goal of product images is to increase your conversion rate on Amazon. This is best achieved by making use of each and every product photo to answer the customer’s questions and persuade them to purchase.
You are allowed to post up to eight images per product ASIN, and this is also an ideal number that allows you to convey a great amount of information to the shopper.
The main product image is quite limited – it must only show the product on a white background, and also needs to be mobile-friendly for viewing on smaller screens. So the secondary images are vitally important to help facilitate the buying process.
What types of product photography work best on Amazon?
There are many different ways you can photograph your products to show what they are, what features they have, key data such as dimensions and materials, how they are used, and to answer common questions that buyers have.
The main types of images that work very well for products on Amazon are:
- The main listing photo (mandatory!)
- An image to communicate the benefits of the product.
- An image which displays key product features.
- An infographic to highlight important information or explain usage.
- An image which shows the size of the product.
- A photo to show the product in use.
- A “lifestyle” photo to show the product in a realistic setting.
- A photo of the packaging in more detail.
There are also many other types of alternate photos you should consider, depending on the type of product you are selling. These include:
- Close-up shots of the back or side of the product, for example to show the different input ports on an electronic item.
- The nutritional information label of a health supplement.
- Different angles of the product for apparel, decorative or gift items.
How should I use the main Amazon product photo?
This is the most important photo. It should be a sleek solo image of the product set on a clean white background.
This is the image consumers see during the search. A strong main listing photo will bring more clicks and conversions, and higher sales.
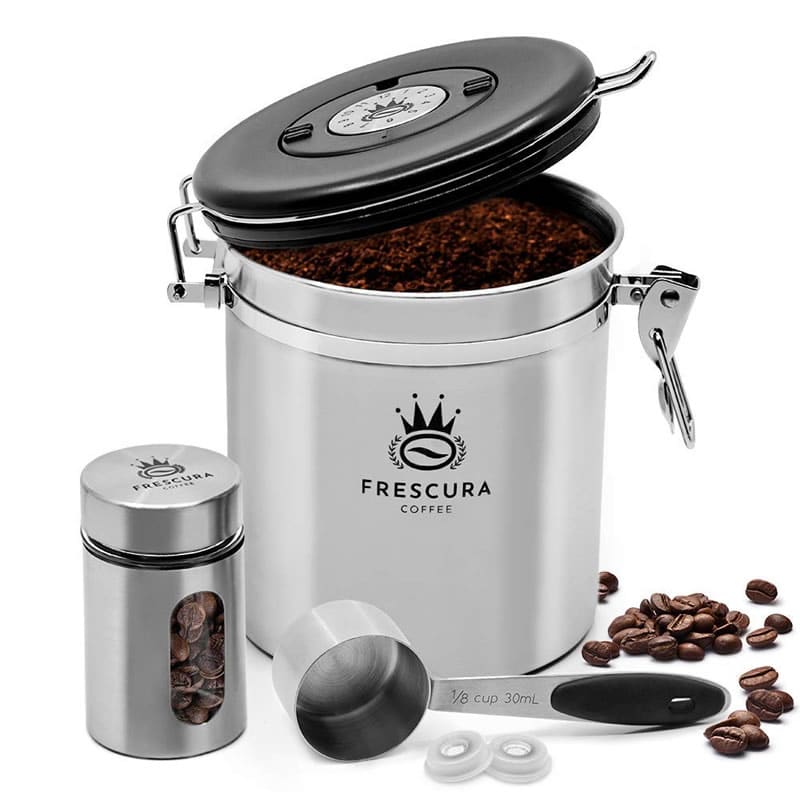
This type of image reinforces your brand, and makes your product more recognizable to customers. The main image must also be mobile optimized to ensure maximum conversion on all screen sizes.
What’s the best way to show the features of the product?
You can use an infographic, close-up photo, or text image to display key product features.
For example, this image explains how each product feature provides a benefit to the customer.
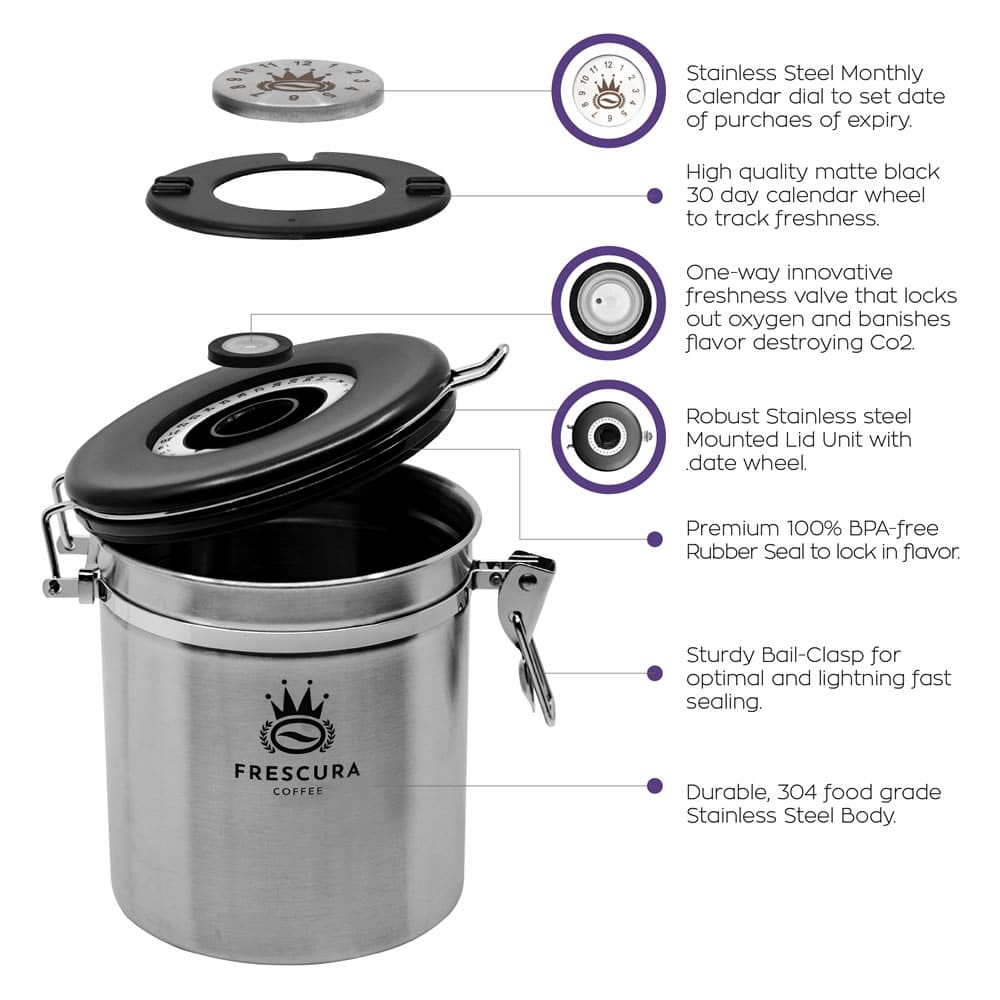
Text and call-outs allow for clear identification of what the consumer will receive with the product. This image can also address potential questions or concerns that could arise.
An infographic can use icons and typography to visually communicate important information, instructions, or additional key features of your product:
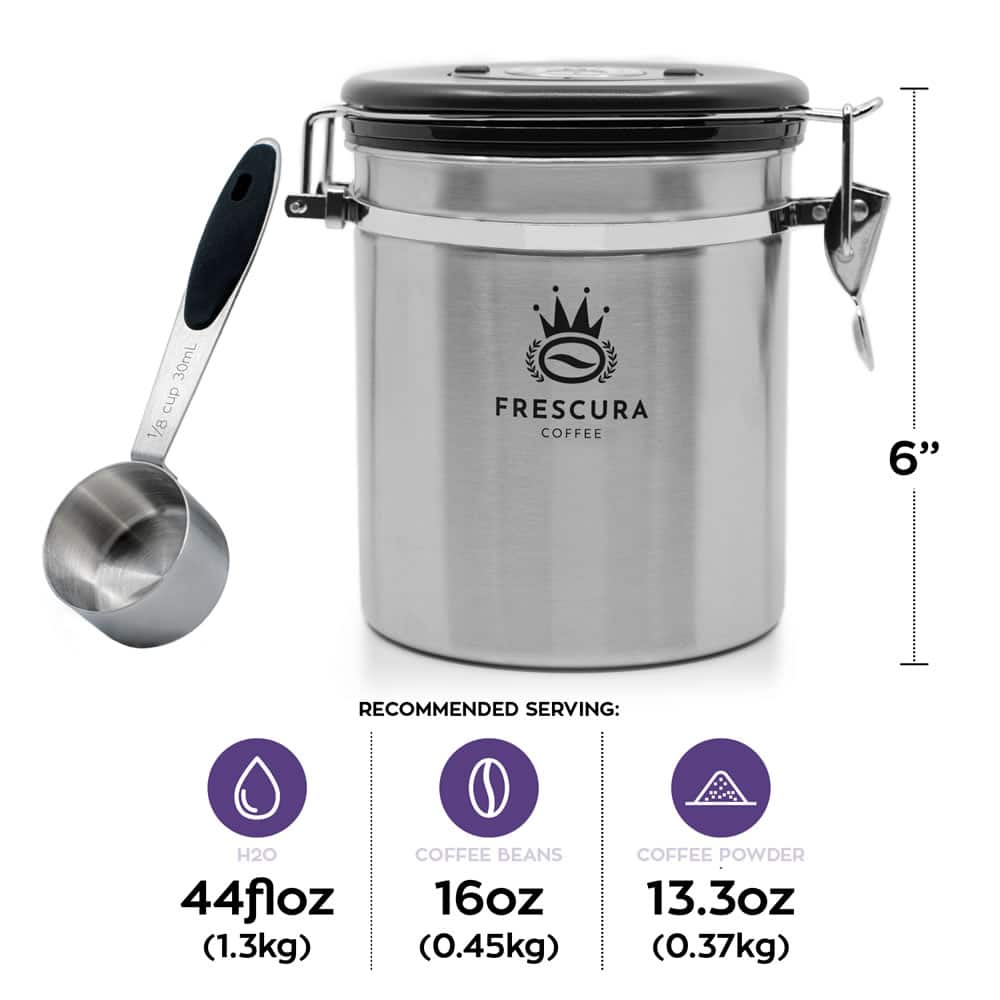
Whenever possible, this information should clearly identify a benefit of using the product to the buyer, not just show the features.
What’s the best way to show the size of my product?
To show the size of your product, set it against a known object or body part with specific dimensions. For example:
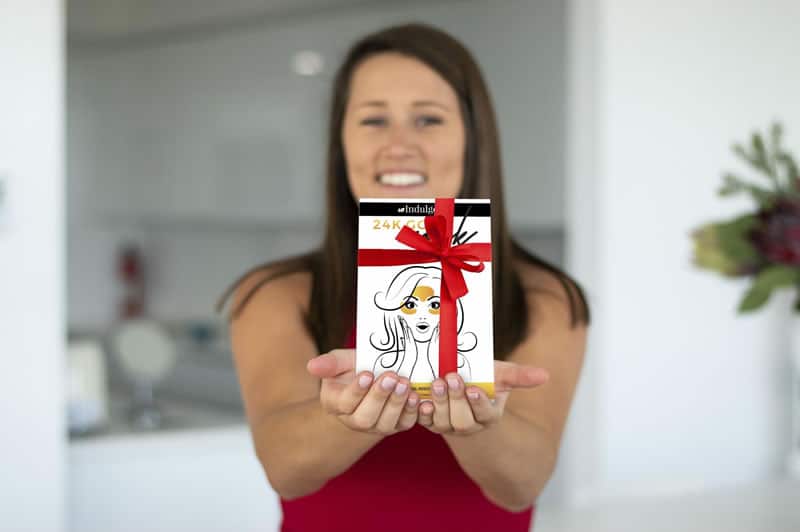
This image allows the shopper to visualize the size of your product. Offering this perspective helps the shopper feel comfortable that they are buying the right item for their needs, and that what they receive will match their expectations. Buyers don’t like surprises, and may leave negative reviews if the product is different from what they imagined.
To add clarity for products where the exact size is important, you can provide the dimensions superimposed onto a photo. However, it is often important to show scale as well, as many shoppers won’t take out a ruler to understand exactly what the dimensions amount to in real life.
What about shots showing my product in use?
When you get down to it, people looking at your product photos want to see how your product solves their problem, and to get answers to the questions they have about your product.
Be sure to show people interacting with your product in a positive way. Show the faces of people when possible, not just body parts. This helps shoppers make a more personal connection to a product. For example:

Show typical usages where common problems are being solved by your product. You can also have photos where specific product features are being used to clearly illustrate the benefit of that feature.
How should I use lifestyle shots in my Amazon listing?
Lifestyle photos allow the customer to picture themselves with your item. The product isn’t necessarily in use, but it can be seen in an environment where it would normally be found.
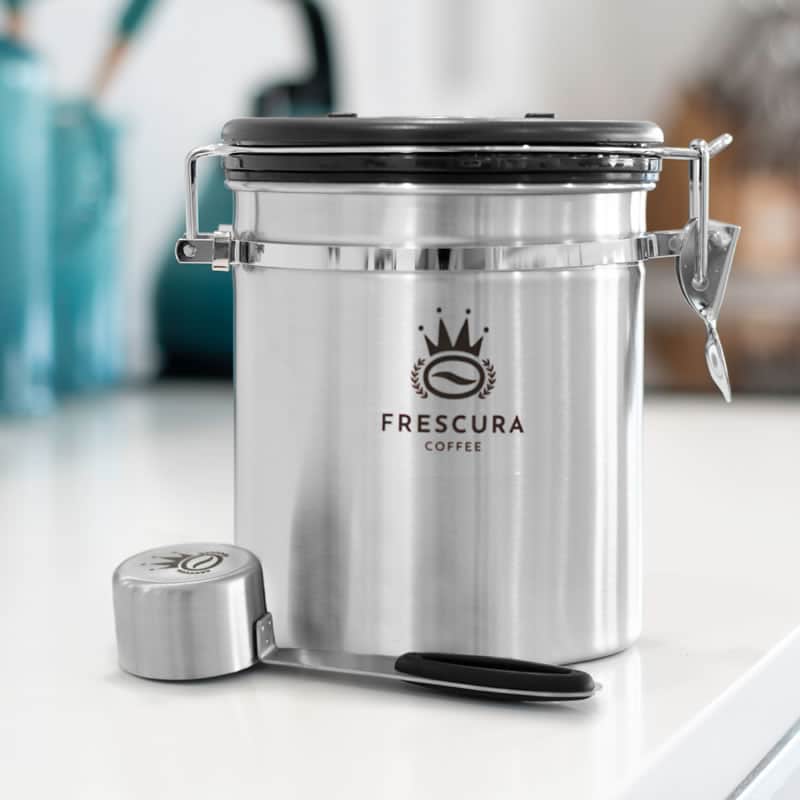
Consider the story that your images are telling. A product like the one above can simply be shown on a sleek, modern worktop to show that it’s the kind of product that belongs in a high-end kitchen. This helps associate the product with an environment that your target shoppers aspire to having.
If it’s a product that’s marketed on its ease of use, perhaps showing an elderly person with your product will convey that message best. If the product is for dogs, show the interaction between the owner and a happy pet.
Not only are you telling the story of your product, it’s also the story of your brand. What sets your brand apart? What is its unique value proposition? Be sure to consider this in the kind of photos you create for each product, and show it within every photograph.
When should I have extra shots of my product’s packaging?
Sometimes the packaging itself is part of the overall buying experience. This can be particularly important for gift items, where first impressions are crucial and unboxing is the most exciting part of receiving the product!
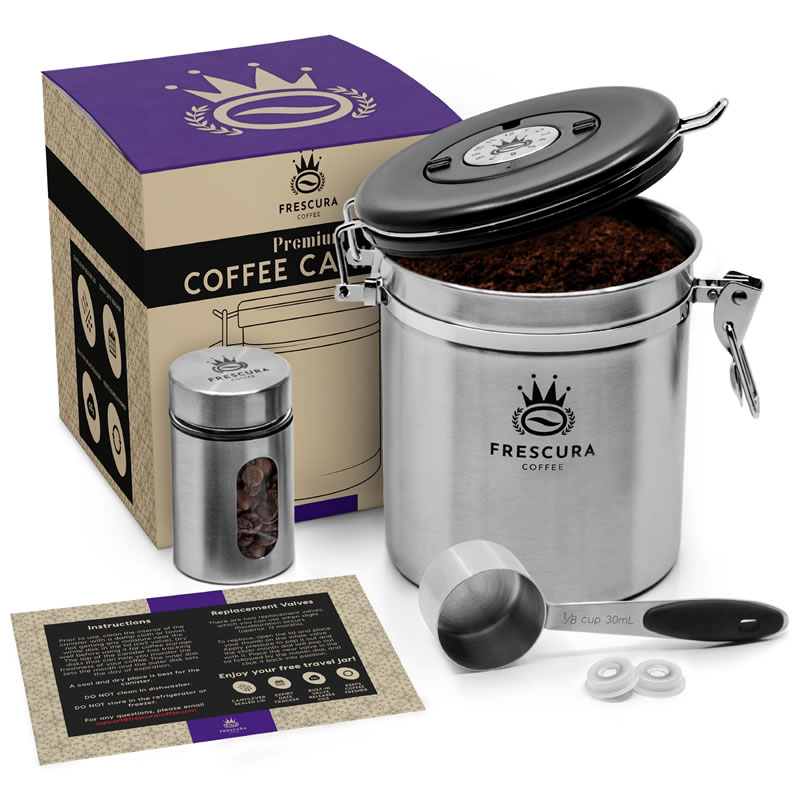
This allows the customer to see all the elements of the product and it’s packaging, and helps build trust in your brand. As with illustrating the size of the product, they will like knowing exactly what you are providing and what to expect when the box arrives.
What are the rules for the main Amazon product photo?
As with virtually everything else in Amazon’s seller content system, Amazon has strict guidelines for images posted to listings.
Amazon provides clear requirements, with additional rules for the main listing photo. This is because of the importance of the main image in search and on mobile.
Here’s a summary of requirements for the main image:
Do’s
- You must photograph the product by itself on a white background.
- The product must fill 85% or more of the image area.
- Images must not be blurry, pixelated, have jagged edges, or be cropped by a frame edge.
- Images must accurately represent the product that’s being sold.
- Images must show only the product that’s for sale out of its packaging.
Don’ts
- Drawings or illustrations are not allowed. Many sellers are using 3D renderings successfully, but strictly speaking these do fall outside the rules.
- The photo must not show accessories or props that could confuse buyers.
- The photo must not include graphics, text, logos, watermarks or inset images added to the image.
- The photo must not show multiple views of the product.
- Apparel must not be shown on a visible mannequin, except for stockings or socks.
- The product must not be on a colored background, or in a real setting (a lifestyle image).
Technical photo guidelines
As you might expect, Amazon is quite specific about the technical standards of your product images as well.
Here are the key requirements to follow:
- TIFF (.tif/.tiff), JPEG (.jpeg/.jpg), GIF (.gif) and PNG (.png) format. JPEG is recommended.
- Image dimensions of at least 1000 x 1000 pixels.
- sRGB or CMYK color mode.
- File names must consist of the product identifier (Amazon ASIN, 13-digit ISBN, EAN, JAN, or UPC) followed by a period and the appropriate file extension. For example: B000123456.jpg or 0237425673485.tif.
Are there any special requirements for clothing?
If you have a clothing or apparel brand, there are another set of rules that apply. The key points are:
- Women’s and men’s clothing must be photographed on a model (since January 2021).
- Women’s and men’s accessories must be photographed flat including scarves, belts, hats, ties and cold weather accessories.
- All kids and baby items should be photographed flat and not on a model.
- Images of intimate apparel, lingerie, and swimwear products may not be sexually explicit or obscene.
Learn more about the Amazon’s standards for clothing photos.
How do you upload product photos to Amazon?
You can add product photos to their listings through your Seller Central account, under each product listing. Here is the procedure for preparing and adding images.
- Find the product you want to upload an image for.
- Click the Images tab.
- Under Main, click Choose File.
- If you have secondary images, upload them using the boxes below the Main Image.
If you use inventory files, specify the product image URL in the inventory file.
Note: Uploading an image does not guarantee that it will be displayed on the product detail page or search pages. Amazon uses its own image ranking algorithm to decide which images to show.
Should I hire a professional product photographer?
You’ll always want to get the highest possible quality images for your listing. In order to do this, you have two options: hire a photographer or take the pictures yourself.
With the lowering costs and rising quality of consumer cameras, taking the photos yourself has become a more accessible option – especially if you are just starting out or are on a tight budget. However, taking great photos is a skill, and most people don’t have the knowledge, equipment or experience to get great photos every time.
For Amazon brands and private label sellers, the best course of action is to invest in professional-grade product photography. You want to have your brand and its products represented at the highest possible level.
An investment in good photography will pay for itself in increased sales over time. Quality photos are your brand’s way of making a virtual connection with shoppers, and that connection is invaluable in the long-term success of your business.
Which product photos will work best for my Amazon listing?
When you start thinking creatively about all the different images you could create for your products, you will soon generate more than eight photo ideas.
So, which types of photography should you use for each product to get the best results on Amazon? There’s no clear answer to that other than to test.
As a first level of testing, you can print out your photos and get feedback from colleagues, friends and family, and perhaps local clubs or groups that are relevant to your product.
Don’t just say, “does this look good?”, but ask them what they would want to know if they were looking to buy a product like this. Are they able to answer their questions by looking at your selected photos? Can they answer them any quicker, or with greater clarity, if you give them a different set of photos?
You can also test photos on your live listing using a split-testing app like Splitly. Another option is to manually alter images and monitor the metrics to find the best combination.
How do I enable image zoom for my Amazon product photos?
As mentioned earlier, your product images are a customer’s virtual substitute for physically handling the product. As such, you want to make sure that the images are zoomable, so shoppers can check out the fine details.
Images need to be at least 1000px or larger to enable the zoom feature. Giving your customers the ability to zoom in on your photos will increase confidence in the quality of your products.
Why does product photography make such a difference on Amazon?
Product photography is the key element separating your listing from its competitors. It’s a way to interact with your customers, showcase your product’s features and benefits, and tell the story of your brand.
High quality photos will draw the attention of shoppers and ultimately increase conversions. They’re a worthwhile investment for Amazon brands who want to create an edge in their category. Who doesn’t want that?
Thank you to Outlinematic for providing the example photos used in this article. Outlinematic provides photography and design services for Amazon sellers, including packaging design, logo design, infographics, A+ Content, product inserts and e-books.
Leave a Reply